
Hello and welcome to my blog!
I am a freelance illustrator, artist and paper crafter. I hope you will set back, have a peek around my blog, check out my archives and enjoy!
I would love it if you would "Follow" me and visit often! :)

Click directly on the green arrow below to hear a quick message from me. :)

Followers


PLEASE CLICK ON THE LINKS BELOW TO VISIT MY OTHER PAGES AND TO GET TO KNOW A LITTLE MORE ABOUT ME. ;)


Some Of My Favorite Creations To Date

Showing posts with label Really Reasonable Ribbons. Show all posts

Friday, December 16, 2011

Come Join In On Our Very 1st CardMaker Magazine Blog Hop!


Hello Everyone!
Welcome to CardMaker Magazine blog's very 1st blog hop!

I can't tell you how exciting it is to be on the CardMaker team along with the amazing ladies that I have the honor to be working with!
I can't wait for you to see what everyone has created!

Our theme for today is "Last Minute Christmas Cards".
I made mine just about as quick and easy as possible by using my "Paper Christmas Trees" digi stamp set.

Here are my cards.
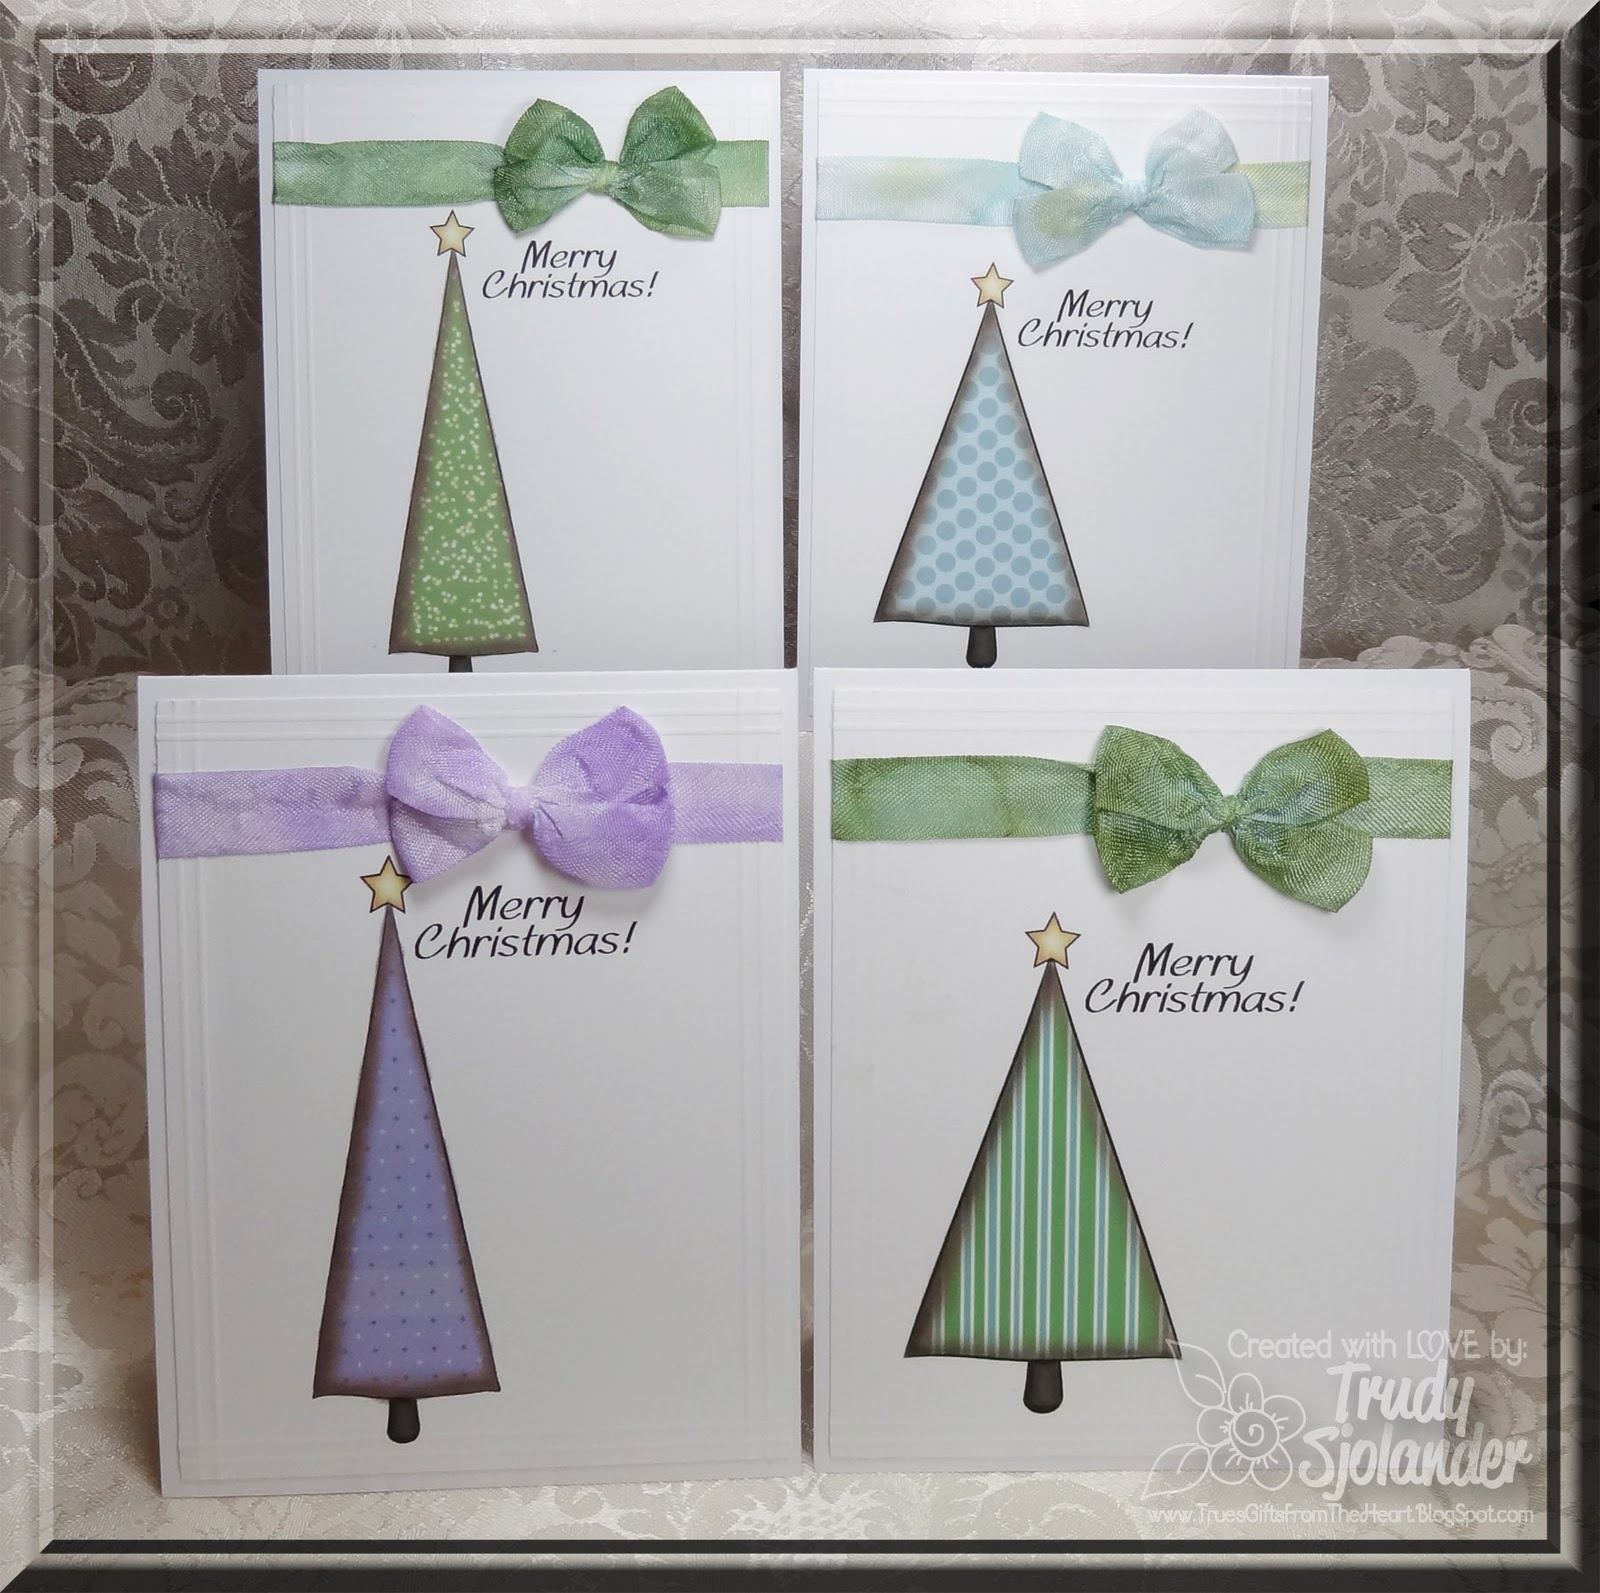

I simply placed 4 trees and sentiments on a page in MS Word, printed, cut them into (4) 4"x51/4" pieces, scored the edges, added a bow made from seam binding that I color dyed to match, attached it to an A2 card base...and voila...four cards in about 30 minutes! :)


I used Brilliant White from Discount Card Stock.
The bows were made with White Seam Binding from Really Reasonable Ribbon that I color died with some Ranger Ink distress inks.

This is what my "Paper Christmas Trees" digi set looks like.
You can download it instantly from Clear Dollar Stamps for just $4.00 and still have time to create some Christmas cards! :)


If you haven't signed up for a chance to win my "Coloring Techniques for Card Makers" book blog candy, it's not too late.

OK now on with the hop and the amazing projects by the rest of the girls!
Trudy Sjolander ~ You are here!  :)

Don't forget to hop back to the CardMaker Magazine blog to have a peek at Brooke's adorable card, and let us know what you think about the hop! :)


Thanks for hopping by! :)

Friday, August 19, 2011

Perfect Pearls Sympathy Card

Hi Everyone!
As usual, I'm super busy today but when I saw this morning's Free For All challenge #F4A788- "Embossing Central" over @ Split Coast Stampsers, I just had to take a break and play along! They asked us to use an embossing folder as our focal point.
Ranger Ink sent me a bunch of goodies last week and included in the package were some Perfect Pearls Pigment kits. I thought this would be the perfect time to try them out!
I have to say....I LOVE "EM!!!!!
It sure added a touch of elegance to what would have been a very plain card.


Here's another shot I took just as the sun was coming up. I couldn't decide which picture I like best so I'm posting them both! :)


The cardstock is Kraft from Discount Card Stock. I added a tiny piece of the "hoarded" cardboard that I scavenged from a fire pit bowl package (see yesterday's post). Hubby thought I was crazy so I can't wait to show him this card!
I used Provo Crafts "Leafy Branch" folder.
The stunning ribbon is from  Really Reasonable Ribbon. It is their Sheer Ruffle Edge Gold and Old Gold Organza. (Using this beautiful ribbon over a piece of trash cardboard somehow felt wrong!) I twisted the organza before I placed in over the other ribbon and really like the look. ;)
I distressed the edges of the paper and stamped sentiment with Ranger Inks Coffee Archival Ink.
The sentiment is from Clear Dollar Stamp's- Heartfelt Sentiments set.

BTW...if you haven't signed up for my latest blog candy, CLICK HERE! :)

Thanks for taking a closer look!
Now back to work I go! ;)

Big hugs!
True :D


Monday, September 27, 2010

Clear Dollar Stamps October Sneak Peeks.

Hello All!
I have 2 Clear Dollar Stamps sneaks to share with you today!
The first is done with my illustration "Autumn Blessings" It will be available for sale as a stamp set Oct. 1st.
It is also available as an instant download digital set now!


My second peek is from my "Something to Crow About" illustration.
He comes with sunflowers, a straw hat, and several sentiments!
Also available on Oct.1st.


I used the fun Yellow Gingham ribbon from Really Reasonable Ribbon.


Please visit Lori's blog to check out the other girls wonderful sneak peeks. You can see slide shows of these sets and if you click on the links that Lori has posted, you can visit their blogs too! I am sure you will be inspired!
~~~~~~~~~~~~~~~~~~~~~~~~~~~~~~~~~~~~~~~~~
Card #1~Card Recipe:
CDS STAMPS USED: "Autumn Blessings"
CS/PAPERS: Paper Trey - Kraft, DCWV - Fall cardstock stack, K&Co - Fall Harvest stack
INK: Staz-On Jet Black, Colorbox - Cream Brown
ACCENTS/TOOLS: Glitter brads, sewing machine with orange thread, Rect. and frames Nestabilities, Wizard, Ranger Stickles - Stardust, Really Reasonable Ribbon's - Rust Organza ribbon
COLORING: watercolors
~~~~~~~~~~~~~~~~~~~~~~~~~~~~~~~~~~~~~~~~~
Card #2~ Card Recipe:
CDS STAMPS USED: Something to Crow About
CS/PAPERS: The Paper Temptress - Heavenly white, black crepe, black Basis, gold Stardream
INK: Staz-On, ColorBox _ Dark Moss and Olive Pastel
ACCENTS/TOOLS: sewing machine with green thread, Wizard, Square Nestabilities, green brads, Diamond Glaze, Ranger Stickles in Lime Green and Gold, Really Reasonable Ribbon's - Yellow Gingham
COLORING: watercolors, Prismacolor black pencil,

Thanks for dropping by!
Hugs,
True :D

Tuesday, August 24, 2010

Poor Girl's Ribbon Organizer :)


Hello All!
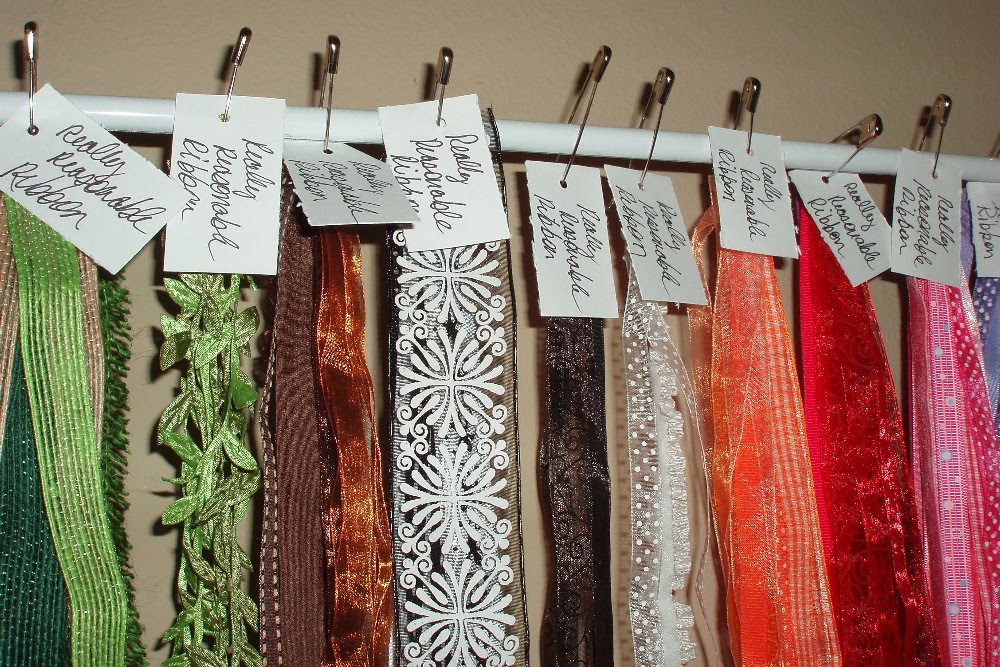
I have spent a lot of my day trying to get my craft room organized again. I thought I would show you what I did with my loose ribbon. I literally have hundreds of rolls of ribbon that are organized in a different manor but since I joined Really Reasonable Ribbon's design team, I have lots and lots of yardage pieces. Now I do have one of those plastic boxes with all of the holes that you pop the ends of ribbon through, but I keep getting it tangled when I pull ribbon through.
My solution was to sort by color and or style and attach like ribbons together by running a large safty pin through the ends, attaching a tag reminding me what company they came from, then closing the pins around a tiny tension rod.
Now I can see all of my ribbons at a glance.
I will cut the ribbon off as I need it but will always save a small piece on the safety pin so I know what I need to re-order. Is that smart or what?? :)
I did mine in one yard lengths and if the ribbon was longer, I just looped it back up through the pin to keep from cutting it into pieces.

Don't have enough ribbons to do this? I know a GREAT place to go shop for some!
Check out Really Reasonable Ribbon's awesome selections!


Hope you liked my little tip!
If so...please give me a "HOLLA"!
Hugs,
True :D