I'm just going to give you a sneak peek of my card because I am hoping that you'll head on over to our CardMaker Magazine blog and check it out there. ;)
I also have a little "Chain Stitching on Cards" tutorial for you there. :)
Now...how do you win this book?
Head on over to the CardMaker blog, leave me a little love, then come back and let me know what you think about my card.
It's that easy!
You don't even have to be a follower but I would ♥ it if you are (old or new)! :)
Christmas is less than a month away and I'm guessing by now, you are in full prepping for the holidays mode!
Well, the Helmar Hotties girls are for sure! We have all created some fun projects to inspire you to get a little crafty this Christmas.
Welcome to Helmar's Holiday blog hop!
If you are here from sweet Jessica's blog, you're in the right place! If you just happened on here, you'll want to head on back to our Helmar blog so you don't miss a thing. ;)
I wanted to do something a little different from my normal card, so I created a Christmas pin using lots of Helmar products and eggshells. You heard it right....EGGSHELLS! :)
Here is my pin:
If you would like to see how to create the eggshell mosaic base for my pin. just check out this video.
(if you want to continue the hop then watch the video, please become a follower and/or bookmark my blog, so you can find your way back when you are finished hopping.
In the video, you saw me use lots of Helmar 450 Quick Dry Adhesive and Helmar Decoupage. I also used Helamr products to assemble my pin.
The Poinsettia Die cut was pieced together with 450 Quick Dry Adhesive.
I attached the poinsettia to the pin base with Helamr Scrap Dots. I love using Scrap Dots for adding floral embellishments because you can easily tip and position them exactly how you want them and it also keeps them popped up better then just gluing them down with regular glue. :)
Here is another pin that I created with the same technique.
Did you like my Poinsettia Christmas pin? Just leave a comment below and you could win it! :)
Make sure you leave a comment at every stop because
the elves of Helmar will be giving away prizes to some lucky Helmar fans. Now
hop on over to Carisa’s beautiful blog to see another amazing Helmar Holiday project.
The Holiday Hop will be open for comments until 11:59P.S.T December 4th
, so take a look and enjoy a little holiday spirit from all of us on the Helmar
Team. Thanks again for stopping by today and Happy Holidays
In the tutorial, I used Tombows but you could also use watercolors or watercolor pencils for the same effect. It is really all about where to place your shading. ;)
I have used this image so much since it released last month! Not sure if it's because of the Summer heat or because it's just so fun and easy to color! :)
Today the Inky Antics girls are doing another blog hop. We have teamed up with the wonderful Tombow team to show you some Inky/Tombow goodness!
If you are here from sweet Debbie's blog, you are in the right place. If you just happened onto my blog, you'll want to go back to Debbie's where it all starts. ;)
Our Inky friend Jackie sent us all some fun Inky Antics stamp sets and a bunch of product that Tombow sent her to give to us!
* See the video below for the exact names of the products and a super quick Tombow coloring tutorial
by me!*
***BLOG CANDY ALERT!***
As I stated in the video, I already have every Tombow marker they make, but I am still glad that they sent me this set because now I can share with one of you! All you have to do is become a follower, if you aren't already, and leave me a comment. It's that easy! :)
The blog hop ends on Sunday, July 24th at midnight Central time. Please visit each DT members’ blog to view their project and leave feedback. The more you comment, the better your chances are to win. (Limit one comment per blog, please). One person’s name will be drawn at random to receive a fun Inky/Tombow prize pack, similar to what each of our designers received to make their projects! The lucky winner’s name will be announced on the Inky Antics blog next Monday, so remember to stop back and see if you’ve won.
This is the package you could win from Inky/Tombow for commenting.
To check out what the Tombow designers have made and get another chance to win prizes, please click here.
Your next stop on the hop is the amazingly fun and talented Tex's blog.
BTW...for a funny "bug" story, scroll down to yesterday's post before you go. I can laugh now but at the time....Geeeez! :)
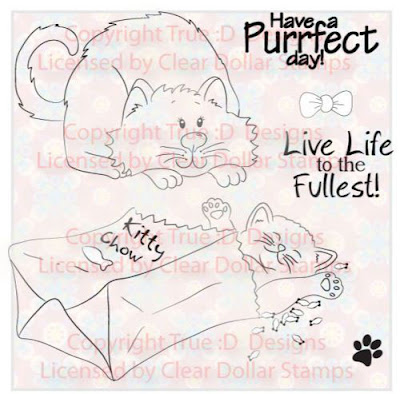
I had several of these "Purrfect Day" kitty digi images that I created for Clear Dollar Stamps colored up from when I tried, tried, and tried again for my latest Prismacolor and Gamsol video tutorial.
I popped in to see what was going on over @ SplitcoastStampers today and they had an adorable sketch for our inspiration. Since I already had the kitty colored, I used in and whipped my card up in a flash! :)
I got a very warm responce to my Inky Antics ~ "Consider Yourself Hugged" card that I posted last week and many of the comments were about the bow.
I even had a couple of people email me with questions on how I did it.
I thought the best way to explain it is with a quick video tutorial. You will see just how simple it is.
The ribbon I am using in the video is from Really Reasonable Ribbon's ~ January Ribbon of the Month package.
The Vintage Pearl Brads are from Creative Charms which works out perfectly because the are our co-sponsor for our current Really Reasonable Ribbon's Rambling challenge. The challenge is "Use Hearts and Ribbon" and runs through January 30th. I think we are all adding hearts to our creations this time of year so why not come join us in our challenge, share your creations with others who would love to see it, and be entered for a chance to win one of the prizes? :)
Once a month, I do a post on the Creative Charms blog and this month, I have created several cards with their beautiful December Kit of the Month that I will also share here. I do hope when you are finished checking out my blog that you will head on over to the Creative Charms design team blog and see all of the awesome projects the girls have created to inspire you.
Today, I have prepared a quick little video tutorial to show you an easy way to decorate a plain ruler with designer paper and ribbon. They would make great last minute stocking stuffers for less then a dollar!
I had 2 different design teams to post for today and instead of doing them separately and having one get lost in the shuffle, I am doing them together!
Have you ever hesitated on buying Creative Charm's seasonal themed "Kit of the Month" kits because it is so close to whatever holiday, that you are afraid you wouldn't be able to use it?
Well don't be! They are such a great deal and the majority of the items in the kit will work wonderfully all year long!
Here are a couple of examples of some projects that I used their November "Fabulous Fall" kit on.
I have a cream pitcher that I used for the color inspiration.
This card was done with Clear Dollar Stamp's beautiful "Clearly Coordinating Collections" papers and ribbon. See the card recipe at the end of this post for color names and links.
If you have not signed up for my birthday blog candy, sponsored by Wild Orchid Crafts, you still have time!
Thanks to all of you for dropping in. I hope you will head on over to Clearly iStamp and watch my tutorial. If ya do...please leave a comment so I will know whether to keep on doing the videos or not. ;)
A couple of weeks ago, I did a card with a ribbon heart on it and got quite a few emails and comments asking how I did it. I worked up a quick little tutorial to show you how. It is quite simple actually and a wonderful way to use up some of those stash scraps!
Several people have asked how I made my faux brads on the card I posted the other day. Thanks for the comments, emails and questions!
Here is a very quick tutorial. You will be amazed at just how easy it is!
Growing Pains
-
Growing is an inevitable process in life. It is true that everything that
is alive will grow, but that growth can look different depending on who is
doi...
In accordance with FTC16CFR, Part 255, I declare that I currently receive or have received in the past, products that I promote and endorse for free or at a discount from the following companies:
K&Company
Xyron
DCWV
Spellbinders
ColorFin/PanPastels
Flower Soft
Touch Twin Markers
Ranger Industries
Basic Grey
Helmar
Want2Scrap
The Twinery
Tombow
Flower Soft
PSA Essentials
Discount Cardstock
Inky Antics
Wild Orchid Crafts
Creative Charms
Clear Dollar Stamps,
The Paper Temptress
I Brake For Stamps
Really Reasonable Ribbon
Annie's Attic
DRG Publishing
JudiKins
Embellish It Online
Cuddly Buddly The Greeting Farm Whimsy Stamps Fred She Said Cuttlebug Challenge Blog Provo Craft Petaloo International Sakura of America
Studio 313
The Robin's Nest While I am compensated by these companies, I maintain the freedom as an independent designer to say what I truly think of their products. I will never recommend something that I don't personally use and enjoy.