Hello and welcome to my blog!
I am a freelance illustrator, artist and paper crafter. I hope you will set back, have a peek around my blog, check out my archives and enjoy!
I would love it if you would "Follow" me and visit often! :)

Click directly on the green arrow below to hear a quick message from me. :)

Followers


PLEASE CLICK ON THE LINKS BELOW TO VISIT MY OTHER PAGES AND TO GET TO KNOW A LITTLE MORE ABOUT ME. ;)


Some Of My Favorite Creations To Date

Showing posts with label anything but a card. Show all posts

Friday, January 10, 2014

Matryoshka Doll, Turtle, and Tiny Flower Cookies

Hi everyone!
I spent a day and a half earlier in the week cleaning out my pantry, so I treated myself to an entire day of cookie decorating!
I mixed up one batch of frosting colors to do 3 different sets of cookies.  :)

I totally forgot to take a photo of the turtles before I packaged some of them up to ship to friends, but here are the remaining three. :)


My friend Lisa collects Matryoshka dolls, so I made my first stacking doll cookies. :)


I love using tiny flower and leaf cookie cutters on the scrap dough left after cutting out the larger cookies. They are bite sized so I don't feel guilty for eating one...or two....or three. ;)


I love creating with any medium, but lately, sugar and flour have been my favorite. :)


Thanks so much fro dropping by!
If you like what you see, please Share, Like, or Pin. :)


Friday, August 2, 2013

I Made Some More Designer Cookies! :)


Hi everyone!

I'm just popping on to share the last couple of batches cookies that I created for the girls at work. 
These I made for my boss's birthday last month. Her name is Sarah Key. Thus the reason for the key cookies. :)
Remember that you can click the pictures for a closer look. ;)

These I made for my co-worker/ friend Alexis. Her birthday is Sunday but we celebrated early. :)
Teal and green are her favorite colors. 


Thanks for stopping by and taking a peek!
If you would like to see more of my cookies or see the ones I have pinned from others, 
please "Follow" me on Pinterest
Please feel free to "Share" on Facebook or "Pin" on Pinterest. :)


Friday, March 29, 2013

"Enjoy the Journey" - Mixed Media ATC for MIX9 @ SplitCoast Stampers


Hi Everyone!

It's Friday, and time for another Mix-ability challenge over at SplitCoast Stampers!
I am so happy to be one of the co-hostesses of this cool weekly challenge. I love joining in with the rest of the hostess's challenges  It is a great way to learn some fun mixed media techniques using supplies that most of us already have at home.
This week is Lydia Fiedler's turn to host and she has come up with MIX9 - "Construction Zone". All you have to do is use some kind of metal and paint or ink on your project, with sanding as an extra feature if you like.
Here is a peek at the ATC sample that I created for Lydia.
(Remember that you can click the image to enlarge for a closer look)

What is an ATC? It is a 2 1/2" x 3 1/2" miniature piece of art that is created by an artist in his/her own style, to give/trade for other similar cards. 
I have done a few in the past but am really enjoying them a lot more as of late. ;)
For this one, I started by painting the card base with gesso and Ranger Ink's Studio acrylic paints. I then crinkled some tinfoil and adhered it to the card base. I painted the foil with gesso and acrylic paint. let it dry, then washed it with thinned black paint and blotted some of it off. After it all dried, I sanded the high spots to reveal some of the foil. I added some gold paint (with some bubble wrap) and some gold-leafing to finish off the base.
I stamped a sentiment from Stamper's Anonymous #CSM155 Simple Sayings by Tim Holtz on to a scrap piece of cardstock that I had already painted to match. I then added some gold paint and covered it with UTEE. I cut it to fit a Ranger Ink's - Idea-ology Ornate Plates by Tim Holtz, and attached it to the card with the provided brads.
To see the entire ATC, please CLICK HERE.

Here is a bonus ATC that I created last minute for both this challenge, and for my new friend Mary Knapp's birthday.
She said she loves butterflies, glitter, and her favorite colors are pink, teal, and silver. 


I used Basic Grey's - Knee Highs designer paper.
The butterfly is from my "Swirly Butterflies" stamp set that I illustrated for Inky Antics. I stamped Perfect Medium onto some clear acetate, sprinkled on some Ranger Ink silver embossing powder,  heat set it then cut it out. I then stamped the image again and "colored" it in with Art Glitter glitters, then attached the acetate butterfly over the top.


Thanks so much for dropping by!

Friday, March 22, 2013

Excited to be Co-Hosting a New SplitCoast Stampers Mixed Media Challenge!

 Hi Everyone!

Today is my very first time to hostess a challenge over at SplitCoast Stampers!
I'm super excited, and hope you will join us and help me celebrate!

My Mix8 Mix-Ability challenge for today is called "Rip It, Paste It, Ink It!". You simply need to create a background for your project by ripping tiny pieces of designer papers, pasting them to cardstock, then adding some ink, somewhere, somehow to tie the papers together. ;)

Here's a peek at my ATC


See the entire piece HERE.

For my card, I used scraps of Basic Grey's new Knee Highs designer papers. I glued them to my ATC sized piece of cardstock with Mod-Podge, trimmed around the edges, then lightly inked over the entire piece with ColorBox's Ice Jade Chalk ink, just hitting the raised areas. Then I inked the edges in black. I added some white gesso under where my image would go so it would stand out and so I could write in the sentiment with a Copic multi-liner pen. I added a thin coat of Matte Mod-Podge to seal it all, then after that was dry, I used Want2Scrap's #4802 Bricks stencil by: Donna Salazar, to sponge on some ColorBox Popcorn colored chalk ink. I quickly sprinkled on some UTEE (Ultra Thick Embossing Enamel) from Ranger Ink, then heat set it.
I stamped the image (from Unity's "Follow My Heart") onto more of the same Basic Grey papers several times, and cut out different pieces to stack. I added touches of Sakura - Gelly Roll glitter pens, then covered each piece in a heavy coat of UTEE before gluing together and adhering to the ATC.

I sure would love to know what you think about my ATC, and I'd love it even more if you joined us in this challenge! :)

CLICK HERE for all of the Mix8 challenge details. :)


Friday, February 1, 2013

Join Us in a Brand New Mixed Media Challenge Feature on SplitCoastStampers!


Hi Everyone!
I was honored to be asked to help hostess the brand new Mixed Media challenge on Fridays over at SplitCoastStampers!
It's not my turn to host, but I plan on participating every week. It's all about showing how fun and easy mixed media can be. Today is the first challenge and the hostess is Ms. Lydia Feidler. She created a beautiful project and a fun video showing the Yin Yang technique she is sharing.  It's a simple one. Just use a gloss and a matte medium together on a project.
 Hope you will come join in in the challenge, or at least take a peek at the amazing projects that are already in the MIX1 Yin Yang challenge gallery.

Here is what I created...

It's an ATC (Artist's Trading Card).
I used my newly released Inky Antics -"Swirly Butterflies" clear stamp set and a Want2Scrap canvas ATC.
For all of the details and a supply list, please visit this project in my SplitCoastStampers gallery.

Thanks for taking a peek! :)


Friday, November 23, 2012

All Things Altered Winter Blog Hop (with prizes!)

 
Hi everyone!
 
Welcome to the All Things Altered Winter Blog Hop!
I hope you had a wonderful Thanksgiving, surrounded by friends and family! After all of that hard work cooking and cleaning, you deserve to take a little break and hop along with us!
 
If you are here from Candice's wonderful blog, you are in the right place. If you just happened on to my blog, head on back to Pam's blog, Scrapbook Flair. That's where it all starts. You don't want to miss a single project or opportunity to win some fun prizes!
 
My project is very simple, but don't we all need simple this time of year? If you are like me, you are in the hyper-holiday mode and it just seems so hard to get my "to do" list whittled down.
 
I decided to alter a little 5 1/2" by 4 1/4" spiral notebook.
 
 
I used My Mind's Eye - Signature Christmas Holiday Glitter Book to cover the front and create the die cuts. The dies are Spellbinder's #S5-121 Frosty Forms set. I blinged it up with White and LeCreme Half Pearls from Want2Scrap, and assorted ribbons and lace from Really Reasonable Ribbon.
 
I thought I would give a gift to one of my wonderful followers since it has been awhile and I love sending happy mail.
 
How about the notebook that I created for this hop and some bling from my favorite bling shop....Want2Scrap?  :)
 
 
Just follow my blog (if you don't already) and leave a comment below. My followers area is at the top of my blog, just under my photo.
 
I will draw the lucky winner on Sunday November 25th.
 
Your last stop on the hop is at sweet Pinky's blog. Bet she has something really cool to share with you!
 
Thanks so much for hopping by! :)


Wednesday, November 14, 2012

CardMaker Holiday Yummies Blog Hop

 
Hi everyone and welcome to CardMaker magazine's "Holiday Yummies" blog hop!
The girls have all created fun little treat packaging with coordinating cards/tags to share with you today. We though it might give you some gift ideas for those special people in your lives who love to receive home-made goodies or treats.
 
I decided do a gift bag filled with peanut brittle. My little secret is, it's microwave brittle and only takes about 10 minutes from start to finish! You could whip of several gifts in no time flat.

 
To make it gift worthy, I simply used a flat bottom cellophane bag from ClearBags.com, added some My Mind's Eye Signature Christmas Holiday Glitter designer papers for a topper, then created this fun tag with Spellbinder's 2012 Heirloom Ornaments. I embellished the ornament with Ranger Ink's Gold embossing powder and Want2Scrap's White Pearls and Turquoise Rhinestones. The ornament was attached with some pretty Turquoise Organza from Really Reasonable Ribbon. The sentiment was stamped with a "vintage" Stampin' Up set and Ranger's Aquamarine Archival ink.
 
Now, the only question is....who's name shall I put inside? :)

 
I thought I would share my recipe just incase I might have got your mouth watering for peanut brittle. :)

Microwave Peanut Brittle
1 cup sugar
1 1/2 cups raw peanuts
1 teaspoon vanilla
1/4 teaspoon salt
1/2 cup light corn syrup
1 tablespoon butter
1 1/2 teaspoons baking soda

Mix sugar, salt, and syrup in a microwave safe bowl and cook on high for 5 minutes. Working quickly, stir in peanuts, vanilla, and butter. Microwave an additional 1 1/2 minutes. Remove from microwave and stir in baking soda. Quickly pour onto a baking sheet that has been coated with butter or non-stick spray. Cool, break into pieces and enjoy!
 
Make sure and visit the rest of the girls to see what yummy gifts they have to share. :)
 
Brooke

Thanks for hopping by!


Thursday, October 11, 2012

I LOVE My KopyKake!


Hi everyone!

I have to share an amazing tool that I got for both crafting and cake/cookie decorating.
It is my new KopyKake projector.
This is what they look like.
I finally had an excuse to use it for the first time, last night.
One of the guys that works for my hubby, is retiring.
Hubs always has me make a cake for his retirees.
Kevin plans on spending his newly found free time, working on his classic car so hubby asked if I could do a picture of his car on a cake. 
Before I got my KopyKake, it might have been tough, but now, it's a breeze!
Here is a shot of the car as I'm starting to lay in the Royal frosting onto waxed paper.


The KopyKake also is a great tool for perfectly placing the sentiment on the cake. No more running out of room for letters! LOL!


After the car dried overnight, I carefully peeled it off of the waxed paper and glued it to the cake with Karo syrup. Then I painted on some grass and shadows with food color.

(Please pardon the poor quality photo. It was taken at 5:00 AM with zero natural lighting)


Thanks for dropping by!
Hope you have an awesome day!


Sunday, September 30, 2012

Another Eggshell Pin

Hi everyone!

I am still finding stuff I made with eggshells that I never posted.
Here is another pin.


The reason I am looking for this stuff you ask?
My tutorial on how to make an eggshell mosaic on Split Coast Stampers.
I hope you will head over there and check it out.  :)
CLICK HERE ;)

Flower and leaves are Prima and the beautiful glitters are from Art Glitter.

Hugs,
True :D

Wednesday, September 19, 2012

Welcome to the CardMaker Magazine Blog's Graceful Leaves Blog Hop!


Hi everyone! 
I welcome you to my blog, and another CardMaker hop, as enthusiastically as I welcome the first signs of Fall!
It's my very favorite season. I don't know what I love more...the cool crisp air, the sounds and rich aroma of fallen leaves crunching under my feet, or the beautiful foliage as it turns it's many shades of splendor.
I can't share the feel or the smell of Fall with you but I can share some of the colors of God's paintbrush!

The CardMaker girls have all created cards for you today inspired by Fall leaves to herald in the new season.
Here is mine.


Right now, the leaves on our Flaming Maple are just starting to turn from green to a burt orange color and I tried to capture that on my card since we are celebrating the first day of Autumn. In a few weeks, I will be able to break out with vibrant oranges and unbelievably beautiful reds. :)

Here's a shot of the inside.


This was a fun and simple card to create so I thought I would share some of the creative process with you.

First I stamped the beautiful #9902F "Every Leaf Fluttering" sentiment from Inky Antics onto a 5"x3 3/4" piece of Brilliant White cardstock.
Then I took some leaf dies and cut out stencils from scrap cardstock.  I placed the leaf stencils over my card front and spritzed them with assorted colors of mists.


After I have done all of the leaves, I placed a scalloped circle over the sentiment and misted the entire card front with Perfect Pearls Sunflower Sparkle mist to give the entire card some shimmer and shine.


The leaves I punched out to make my stencils, were still laying on my table, so I thought I would incorporate them into my card as well. I sprayed them with pretty heavily with mists.


I hate wasting all of the mist that is left laying on my non-stick craft mat, so I took a piece of scrap paper and soaked it all up. There were a few white spots on the paper after I turned it over so I added just a bit more mist to fill in the bare spots.


I let all of the pieces dry, used the color matched paper that I created with the left over mist for the second layer of the card, and the trimmed off scrap pieces to accent the inside. Then I add the leaves that had started out as scrap pieces from my stencil making step with foam dots.

This card really just evolved into what it is by me using what I had on hand. I had originally planned on it being a simple white card with a few misted leaves and a bow when I started out :)


~~UPDATE~~
Once again, I used another byproduct for crafting. I had picked some leaves from our Maple tree for the photo shots of my card. They were very pretty and I hated to waste them, so I used some Mod Podge and a canning jar to create a coordinating Fall candle. :)


CARD RECIPE
#9902F "Every Leaf Fluttering" from Inky Antics
Gold Ore Metallic, Brilliant White, and Midnight Black cardstocks from Discount Card Stock
Gold seam binding from Really Reasonable Ribbon
Provo Craft Cuttlebug 2x2 Fall leaf die set
Ranger Ink: Butterscotch and Meadow Color Wash sprays, and Sunflower Sparkle Perfect Pearls Mist.
Mod Podge

Thanks so much for dropping by!
I hope you take time to enjoy the beauty of the ever changing colors of Fall.
I would love to know what your favorite thing about Fall is!  
Pop it in a comment below before you go. :)


Here are the links to the rest of the CardMaker girls blogs so you can hop by and check out the stunning projects they have prepared for your viewing pleasure.

Anya
Carolyn
Colleen
Glenda
Jennie
Kimberly
Brooke (CardMaker blog)


Monday, September 17, 2012

My Day to Post on the CardMaker Magazine Blog. ;)


Hi Everyone!

I would like to invite you over to the CardMaker Magazine blog to check out the article I wrote for today. I created a hand-painted sugar cookie to coordinate with one of my newly release stamps from Inky Antics.
I will show a peek here, but for a closer look (and a look at the cookies before they were painted) please VISIT THE CARDMAKER BLOG.  :)


Thanks for HoPpInG by!


Thursday, September 6, 2012

More Sweet Treats to Share


Hi Everyone!

Hope you don't mind me sharing my goodies on my blog. I know most of you are here because of my cards. :)
I made some truffles for a friend who is on Weight Watchers. They are 2 points each so she can have one a day on the days she has extra points to use. 
They are strawberry, vanilla and chocolate.


Any flavor of cake, baked per recipe. Cool and crumble. Add enough frosting (I use homemade Butter-cream) to make it just moist enough to form a ball. Start with 1/8 cup frosting. You don't want them soggy. Roll into 1" balls, then dip in melted Candy Melts and drop on waxed paper. Decorate to your liking before candy hardens.
They store at room temperature for about a week or in the fridge for a couple of weeks in an air tight container.

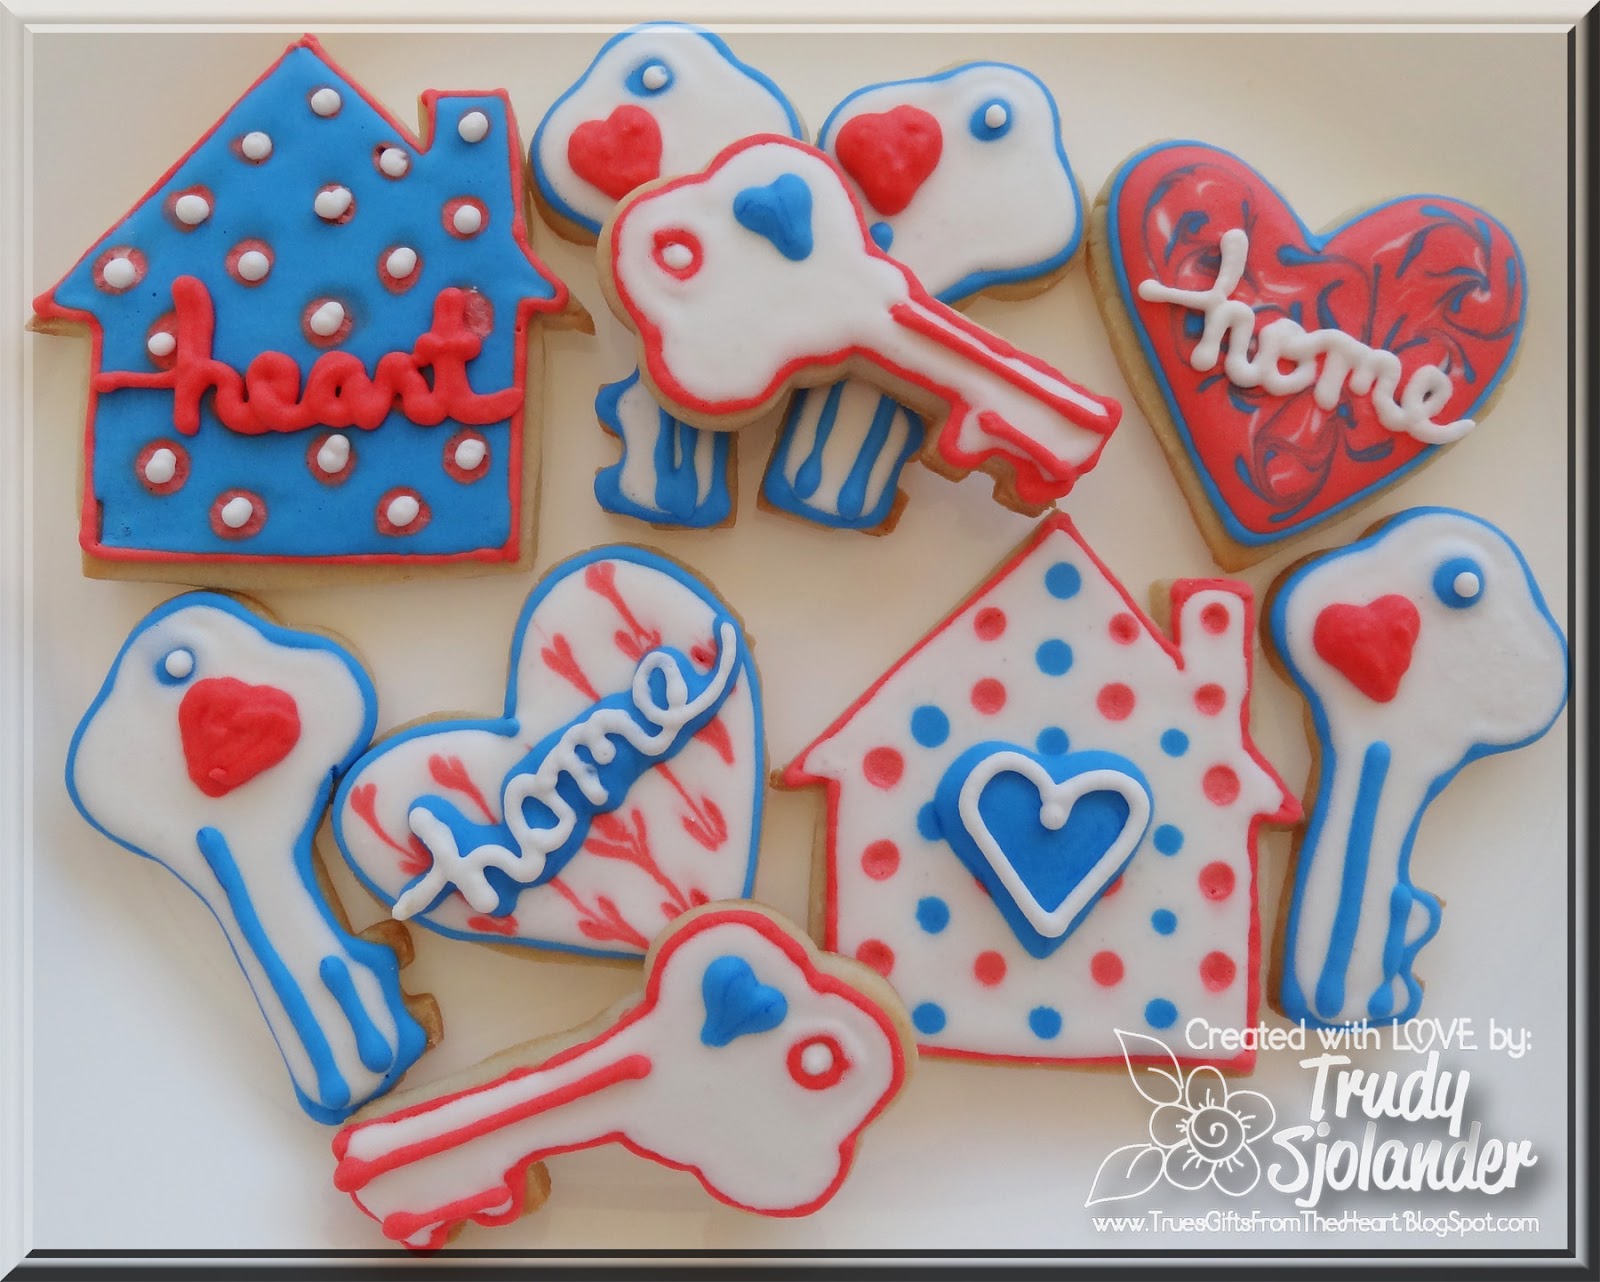
I also made some "HOME" themed cookies for some friends/family that are house hunting. :)


Thanks for dropping by!


Art With Sugar and Flour


Hi everyone!

I thought I would pop on and show you some goodies that I created for a friend's function last week.
I don't care what medium I create in....I just love creating! :)

My first ever "ruffle" cake.

Royal frosted sugar cookies.

Cream cheese butter mints.

And a Pineapple Upside-down cake turned right-side-up and frosted in the shape of a "50". :)


The cakes look small but they really weren't. That was a deep table! :)

Hope your day is a SWEET one! :)

Hugs,


Thursday, August 16, 2012

My Final Post as an Art Glitter Girl


Hi everyone!

Today is my last post as an Art Glitter designer. I loved being on the team but need to spend more of my crafty time on illustrating and promoting my Inky Antics stamps and  creating magazine submissions.

I would love it if you would head over to the Art Glitter blog and check out my "Live, Laugh, Love ATC"!

Here is a peek. 


Thanks for dropping by!


Friday, August 10, 2012

I've Been Gettin' Artsy With Sugar! :)


Hi everyone!

I love creating...whatever the medium. :)
I recently broke out with some long neglected cookie cutters, after being inspired by some cookies I have seen on Pinterest as of late. :)
Here are just a few I created.


Hope your weekend is a SWEET one! :)